
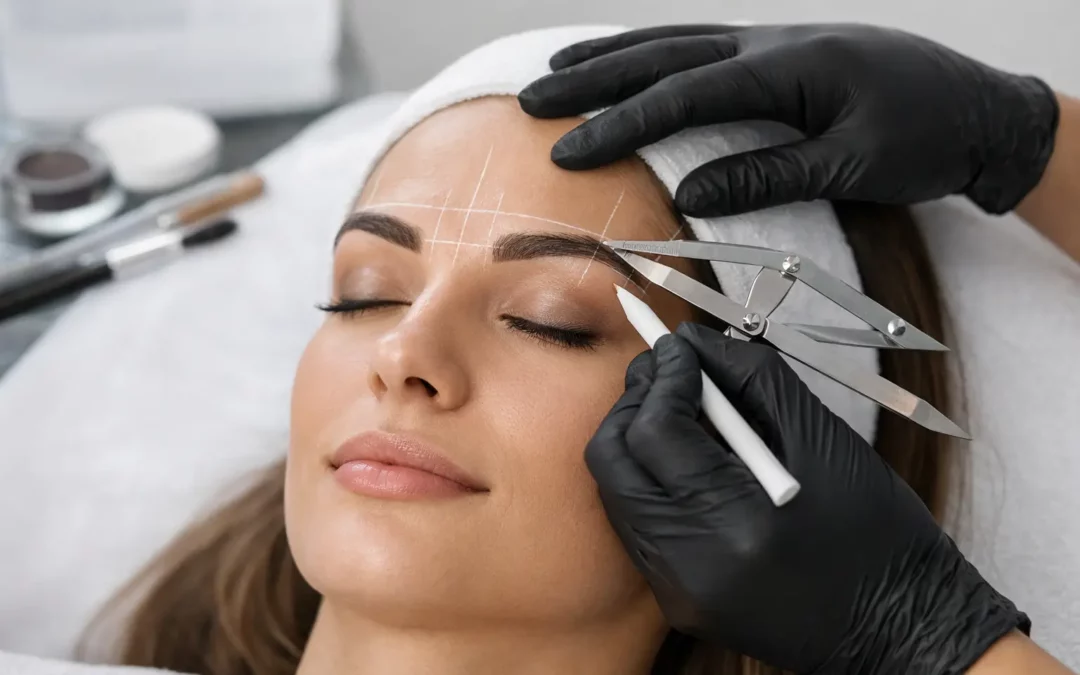
A brow map can look perfectly symmetrical on paper and still fail on a real face. That is why learning how to practice brow mapping is less about drawing straight lines and more about training your eye to read bone structure, muscle movement, hair growth, and natural asymmetry. The goal is not to force identical brows. It is to create brows that look balanced, intentional, and believable on the client in front of you.
For aspiring brow artists, this is a foundational skill worth slowing down for. A rushed map affects every service that follows, whether you are shaping, tinting, laminating, applying henna, or planning a permanent makeup procedure. Clean technique and repeatable measurements build trust. Guesswork does not.
Start With the Purpose of Brow Mapping
Brow mapping is a design process that establishes the beginning, arch, tail, thickness, and overall balance of each brow before product or hair removal touches the skin. It gives you a visual plan and gives the client a chance to approve the direction before the service begins.
The common mistake is treating mapping like a stencil. Faces are not flat, and the left and right sides are rarely identical. One brow may sit higher because of muscle activity, an old scar, hair loss, eyelid shape, or habitual facial expressions. Your job is to improve visual harmony while respecting what the client naturally has.
A strong map considers three things at once: facial proportions, the brow’s existing growth pattern, and the service being performed. A map for a soft brow tint may preserve more natural variation than a map for powder brows, where every line becomes part of a long-term design. The more permanent the result, the more careful your mapping practice needs to be.
Set Up Your Practice Kit Like a Professional
You do not need an expensive setup to develop accuracy, but you do need consistent tools. Use the same basic tools each time so you can identify whether an issue comes from your technique rather than changing equipment.
Keep a brow pencil or mapping string, a ruler or caliper, white mapping paste if appropriate for your model, spoolies, cotton applicators, makeup remover, and good lighting. Take clear before-and-after photos from directly in front of the face. Photos reveal uneven tails, arches that are too sharp, and lines that may be missed when you are standing close to the model.
Sanitation belongs in practice from day one. Disinfect reusable tools according to manufacturer instructions, use disposable applicators where needed, and never practice habits that would be unacceptable on a paying client. Technical talent without infection-control discipline is not professional training.
How to Practice Brow Mapping Step by Step
Begin every map with the client or practice model sitting upright, looking straight ahead with a relaxed face. If they are lying down, gravity and eyelid position can change how the brows appear once they sit up. Ask them to soften their forehead and avoid raising their brows while you mark.
Brush the brow hairs into their natural direction before measuring. Do not flatten them into a shape they will not hold at home. Then identify the central facial reference point, usually the center of the nose and cupid’s bow, and use it to guide the overall balance of both brows.
Mark the front of each brow first. A traditional guideline runs from the outer edge of the nostril toward the inner eye area, but this is a starting reference, not a rule that overrides the client’s features. If the natural fronts are closer or farther apart, assess whether moving them would look artificial or require removing healthy hair unnecessarily.
Next, identify the arch. Use a guideline from the nostril through the outer edge of the iris while the client looks directly forward. Check it against the natural highest point of the brow and the client’s bone structure. An arch that is placed too far inward can create a surprised expression. One placed too far outward can make the brow look flat or heavy.
For the tail, use a guideline from the nostril toward the outer corner of the eye. The tail should generally taper with intention, not drop so low that it pulls the eye downward. On clients with sparse tails, it may be more flattering to create a shorter, lifted finish rather than chasing an overly long line.
Once those points are in place, connect them lightly. Step back, look at the entire face, and check the map from more than one angle. Measure the brow heights, lengths, arch placements, and tail endpoints, but do not erase a naturally flattering feature simply because a ruler says the brows are different. Measurements inform your decision. Your trained judgment finishes it.
Use Repetition Drills Instead of Random Practice
Practicing on a different model every time can build confidence, but it can also hide weak fundamentals. Add structured drills so you can see whether you are improving.
Start with printed face charts and map the same face repeatedly. Set a timer for 10 to 15 minutes, then compare each version. Look for recurring issues such as fronts that are too square, tails that fall too low, or arches that are not level. This drill builds hand control and helps you understand how small changes alter expression.
Then practice on mannequins or willing models with different face shapes and brow densities. Work with naturally full brows, sparse brows, uneven brows, mature skin, and brows with old over-tweezing patterns. A technique that looks good on one face is not automatically transferable to another.
Take standardized photos and review them side by side. Ask yourself whether the brows appear balanced when the model smiles, squints, raises their eyebrows, and returns to rest. Movement matters. A map that works only when the face is completely still needs adjustment.
Learn to Correct, Not Copy, Asymmetry
The phrase “brows are sisters, not twins” is useful, but it can become an excuse for careless work. Some asymmetry is natural and should remain. Other asymmetry can be softened through thoughtful shaping, product placement, or color placement.
For example, if one arch is naturally higher, do not automatically remove hair from the lower brow until both match. You may create thinness, weaken the shape, or leave the client with a brow that is difficult to maintain. Consider whether a subtle adjustment to the higher brow, a slightly fuller top line on the lower brow, or strategic tinting creates a more balanced result without overworking either side.
This is where beginner artists need mentorship. Mapping is not a race to make every number identical. It is a consultation skill, a design skill, and a technical skill at the same time.
Practice the Consultation Along With the Map
A client should understand what you are planning before you begin waxing, tinting, laminating, henna application, or any permanent procedure. Practice explaining your map in simple language: where you plan to keep fullness, where you may clean up growth, and why you are recommending a softer or stronger arch.
Ask about their daily brow routine, previous services, skin sensitivities, medications, and desired maintenance level. A client who fills in sparse areas every morning may want a different result from someone who wants the lowest-maintenance shape possible. For permanent makeup, this conversation must be even more detailed, including realistic expectations and suitability for the service.
Professional standards also vary by service and location. Requirements, permitted services, licensing, and health regulations can differ between provinces and states. Before adding a new brow service to your menu, confirm the rules that apply where you work and seek training that treats compliance as part of the career, not an afterthought.
Know When Your Mapping Is Ready for Clients
You are ready to progress when you can create a clean map consistently, explain your choices confidently, and recognize when a client’s natural features call for a customized approach. You should also be able to remove and redraw a map without frustration. Redrawing is not failure. It is quality control.
At Voila Academy, hands-on brow education is built around this standard: learn the technical steps, understand the safety expectations, and develop the judgment to deliver work you can stand behind. A certificate means more when the artist holding it can create safe, polished results beyond the classroom.
Keep practicing slowly enough to notice your patterns. Every accurate map strengthens the eye, the hand, and the confidence that clients feel the moment they sit in your chair.